
Here you will find all kinds of things that haven't gathered enough information - yet - to have their own page. As soon as we get more discussions on these things, I'll move them to their own pages.

Silversmithing
Date: Mon, 30 Nov 1998 08:33:56 EST
From: Annor
Silversmithing can become very expensive if you let it (just like any other craft/hobby) but you can start out relatively cheaply by doing lost wax casting. The only equipment you really need is heat source ( a candle or alchol lamp) to heat the wax and some wax to work. The tools I use for wax are readily available around the house (a butter knife, a nut pick, and an X-acto knife).
You carve what you want cast in silver (or bronze, copper, or gold, depending on the effect...or how flush you are at the moment),and mail it to a company that does jewelry,or art casting and for a fee they will do the heavy work of making the mold and casting it in metal. Then you just need to clean up the surface with very fine sand paper and steel wool. If you happen to have a rotory tool (ie, Dremmel) it makes life easier, but elbow grease works too. Small metal files called needle files are a big help, and very inexpensive.
The one thing I would suggest is that if you are creating asthames and are looking for a true cutting edge ( for ritually cutting herbs and such) you will have a hard time keeping an edge on silver as it is too soft a metal to hone well, you may prefer to make the blade out of a ready made or stock blade and just create a handle yourself.
I am looking to do this soon too, but I wanted to have a glass blade, or a stone one (onyx), with the silver handle.
If I can be of any more help, just let me know! sorry, my typing is none too good, so if I didn't cover it completely enough...just ask!
Feathers
 Date: Mon, 30 Nov 1998 19:29:35 EST
From: Sandi
I have a question for you concerning feathers. I have quite a collection of "stuff" that I keep in an antique Japanese hibachi, shells, bones, antlers, and of course feathers. My problem is that the feathers that I collected from a found bird are being eaten by something in my house!! They are being eaten right down to the "bone". Any ideas on how to prevent this? I am assuming that the culprit may be palmetto bugs (roaches, yes I admit there are some of those big ones running around in my house). How can I bug proof my beautiful feathers? I was so lucky to have received them in the way that I did...and I hate that they are disappearing before my eyes.
Date: Mon, 30 Nov 1998 17:19:51 PST
From: Nina Twitchell
I use to live in Florida.......for Palmetto bugs boric acid around the area that you keep the feathers should help. It is not full proof, but at least it is not a deadly poison.....but it will repel and kill those ugly palmetto bugs.
Painting
 Date: Sun, 29 Nov 1998 22:10:18 EST
From: Devon
As for crafts-painting, I paint on rocks, boxes, anything, basically except for canvas! We did Santas on small paintbrushes for ornaments last year. Um, I've painted on rocks (pictures, plesiosaurs...), doorhangers...you name it, I've probably decorated it (except for stools, haven't done that yet-but now that I have a nephew, he'll need a step-stool eventually ;p)
[pagancrafts] Beach/Water Crafts
Date: Thu, 03 Dec 1998 15:02:42 -0800
From: Crone
Organization: Mama Yasmini's Place
I often feel a great affinity to water and the sea. Do any of you incorporate things like shells and driftwood and sand into your crafts? And, if you do, how do you do it? I would love to have the grandkids collect some thing for me that I could use in crafts.
Driftwood is supposed to make great natural wands for water magic since it's been worn smooth by the motion of the water and has absorbed the power of the sea.
I used to use cowrie shells for divination, but they were stolen a number of years ago and I really miss having them. However, we don't have cowrie shells in this area and, depending on the size, they can be expensive - at least for my budget - to buy. However, there are other shells and parts of shells that can be collected here and the grandkids have done so when I've taken them to the beach. The only problem with that was that they wanted to keep them, and I have a feeling that their mom (my DD) tossed them. Bet she's kicking herself now since she could use them to decorate her candles. (Grin)
There is a legend that if you wash your floors with kelp (bladderwrack) it works to keep the energy positive and increase prosperity in either your business or your home. And, you can also use kelp in money spells.
Does anyone have any ideas as to what else can be utilized from the beach/water for crafts?
Date: Sat, 05 Dec 1998 03:49:37 -0600
From: MysticMoonWolf
This is taken from Scott Cunningham's book "SpellCrafts", so it may look familiar to some here:)
Magick Mirror
Items Needed:
50-150 shells of various sizes. Scallop shells are ideal. Have at least one dozen tiny shells to fill in small places
Clean sand or white-colored, fine aquarium gravel
Household glue-should not be instant drying, and should dry clear
An 8-inch square piece of thin wood or corrugated cardboard (wood preferable)
1 round, 4 inch mirror with no molding or frame
Ruler and pencil
Moistened and dry cotton cloth
Large scrap piece of corrugated cardboard
Chewed piece of bubble gum or tape
1 blue candle and candle holder to be used in the ritual to bless the magick mirror
Step#1. Assemble all the items on a table or other flat surface. Sort shells according to size and if you wish, color. Hold your hands over the shells and say,
Step#2. Using the pencil and ruler, draw lines across the wooden or cardboard base, from a to c, and from b to d. This will allow you to accurately place the mirror onto the center of the base.
Step#3. Allow at least 1/2 hour for this step. Place mirror onto center of base, using lines as a guide. Place the shells in a symmetrical pattern on the base around the mirror. Some of them may overlap a bit onto the mirror itself. Some suggestions: begin with the largest shells first, then fit in the smaller ones. Large shells can be placed at the base's four corners. Shells of different colors can be alternated to form pleasing, contrasting patterns. A large shell can be placed between two corners to create the "top" of the mirror. Cover as much of the base as possible. If you don't like the pattern, begin again. This is the time to decide, not later during gluing.
Step#4. When you've finished your pattern, individually transfer the shells to a flat surface, re-creating the same pattern there.
Step#5. Enchant the mirror by holding your hands above it and saying, in soft and dreamy voice:
Step#6. Apply glue to back of mirror. Also apply glue to center of base. Place mirror onto center of base. Press base and mirror firmly together. Allow to dry atleast 1/2 hour.
Step#7. Apply glue to base around mirror. (If glue smears on mirror, remove it with moistened piece of cloth) Spread glue evenly with finger. Pour sand onto glue, ensuring an even coat. Allow to dry atleast 15 minutes.
Step#8. Tip up one end of base and tap gently on reverse side. Some sand will slide off. If the base isn't completely covered with sand, re-glue those areas and pour on more sand. Let dry 15 minutes.
Step#9. Spread glue onto scrap piece of cardboard. (or paper plate). Press bubble gum or tape on center of one large shell that you'll be using in your pattern. Using the gum as a holder, lift the shell, quickly dip its edges into the glue, and press it firmly onto the base according to your pattern. Carefully detach gum or tape.
Step#10. Repeat entire procedure for each shell. Begin with largest shells. It's best to also start with those shells that are close to the mirror, then work your way outward toward the edges of the base. Remove all glue smears immediately from mirror with moist cloth and dry. Do't be tempted to check if the glue has fastened the shells to the mirror. It's best not to touch them until the glue has had time to dry. If you find you're losing your pattern you created, alter it as best you can. Shells seem to grow or shrink when you're actually trying to glue them to fit the design.
Step#11. Fill in any holes with leftover small shells. These can be difficult to accurately place, so use care. Allow glue to dry for atleast 1/2 hour.
Step#12. Gently touch each shell. If any are loose, re-glue and allow to dry atleast 15 minutes.
Step#13. Charge the blue candle with psychic energy. Place it into the holder. Place holder onto center of mirror. Say these or similar words with your hands held palms downward over the mirror:
Allow candle to burn for 9, 18, 7, or 36 minutes. Snuff out candle's flame and wrap mirror in blue cloth when not in use.
To use, position mirror so that it reflects the ceiling (this may be achieved by leaning it against a book). Turn off lights. Empower a blue candle, light it, and place it behind the mirror where it won't be reflected. Sit comfortably before the mirror, breathe deeply, and gaze into the mirror. Allow yourself to be psychic.
Date: Fri, 04 Dec 1998 11:39:53 -0800
From: Crone
Organization: Mama Yasmini's Place
Thanks for the Magic Mirror instructions, Mystic. Yes, I do have that book. However, trying to find "intact" shells to do things with is pretty hard - especially in our more northern areas.
I was thinking more of ideas that could come from an outing to the beach with the kids "wild-crafting" whatever can be found lying around. There is usually a good amount of driftwood in our area considering we are in a logging province and on the river. (grin) Shells, well, it would probably take me a couple of years to come up with 50-100 shells - even the scallop ones - that were still in one piece and could be used to make the mirror. However, when I used to take the grandkids to the beach - heck, even when I walk them down to the river near me now - I can usually come back with treasures that they collect and run to give to me. Pretty stones, bits of shell, strange shaped pieces of wood. I know that some of these will be going to Nancy now that she's started making candles, because there are quite a few things that will make great decorated candles. But, unless I make something out of what they give me pretty fast, the treasures are going to wind up in the garbage simply because I have absolutely no room here to store anything like that until my creative juices may spring into action. It's made even harder by the fact that I can't use glues and sealers and things like that.
So, any and all ideas for little things that this natural person can use these treasures for are welcome. Just pretend I live I couple of hundred years ago and there is no such thing as "glue" and "polyurethane" and other things like that. (grin)
Date: Sat, 24 Oct 1998 12:46:01 -0700
From: Crone
Organization: Mama Yasmini's Place
And, mentioning the deerskin - does anyone on here work with leather? That would be another great area to go into. Of course, I would either have to buy from Tandy or another supplier or find someone who hunts and tans the skins. Ah, well, so many addictions, so little time.
Date: Fri, 13 Nov 1998 08:39:28 -0600
From: Traci' L Pederson
does anyone do any wood carving?
Date: Mon, 16 Nov 1998 12:40:49 -0800
From: Crone
Organization: Mama Yasmini's Place
Traci, here's a site that features Wood Sculptures of Many Kinds, An Assortment of Excellent Carving Tools, Huge "How To" Book Selection, Permanent Classroom Facility for Use, Fully Functioning Working Studio. Now, I don't know where you are located, so their classroom and working studio may not be of any help, but you should be able to get some ideas from the carving tools section and the "How To" books. (smile) There are many more sites out there, and I'll send along what I find when I find it. (grin)
Windchimes and MORE
[pagancrafts] Windchimes
Date: Sun, 08 Nov 1998 01:29:37 -0500
From: MysticMoonWolf
Does anyone have any ideas for windchimes or how to make them?
[pagancrafts] Windchimes, trays, etc.,
Date: Sun, 08 Nov 1998 05:51:45 -0800
From: Endora Aphrattos
Organization: PHOENIX RISING OCCULT MAIL FORUM
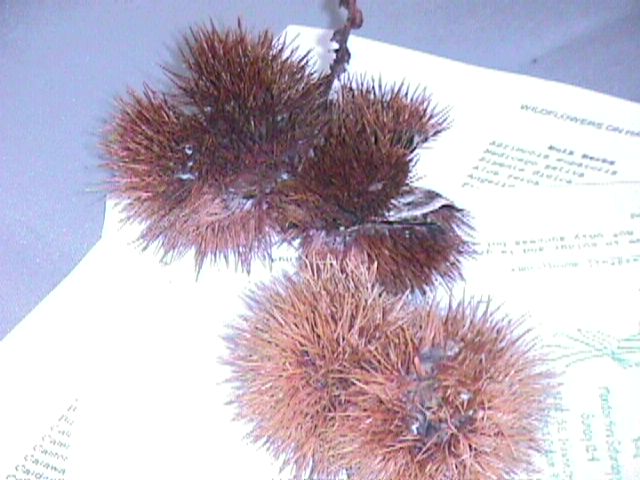
I made a really neat one once out of a starfish (a BIG ONE) and fastened strands of shells, sand dollars and witch burrs (Carole's note: see photo at the end of this post) all along the rays of it. It was really neat. It does take a little creative effort though to set it up so that ti will actually make neat noises. But it can be done. Or you can add little brass jingle bells which work and blend in nicely too believe it or not.
I also made a plant hanger in a similar way. I took two of them and strung witch burrs and ran these between the rays of the two starfish whose undersides were facing one another. Then I ran a loop of witch burrs through the middle of the top fish so it could hang. Then I hung strands of shells and sand dollars from the bottom one and put a fern in between the two fish. I decorated it's pot with shells and sanddollars.
Another really nifty and practical seashell craft is to take a tray (the kind with a ridge) and arrange little flat shells and sand dollars and even tiny starfish or seahorses work well. Many of the rough shells can be dyed with food colouring; any of them hold paint well if you want to colour them. Anyhow, make sure they are small and reasonably flat or at least do not rise over the ridge of the tray. It's better if all of them are approximately the same height. Paint the tray if this is desired. Put the tray somewhere that it won't be disturbed and is stable. Arrange the shells in the pattern you want as closely together as possible. Making a pentacle design would be very simple. Once they are positioned as you like pour acryllic over this carefully until it is level and let it set as the instructions indicate. This would be a great addition to most any altar. You can do the same with stones and gems or even flowers and ferns. They look really nice. There is also a grout that can be used for the same thing that makes it a bit more interesting and leaves some of the shells, stones, etc., exposed filling the spaces between with the solid grout. I forget the name of the product, but any craft shop should be helpful with that.
I like working with acryllic. You can get kits to make globes, cubes, pyramids and they make great paperweights. You can fill them with anything and they're really neat!
A friend of mine once made an aquarium out of a two liter bottle. Now they have three liters which would work even better! He glued shells all over the hard, black plastic base of three two liter bottless (he removed two of them from the bottles first) and cut the top portion off of the bottle that still had the base adhered to it (of course he also removed the label. GRIN). He filled one of these with clay and let it set. This is just for weight so it doesn't tip easily. Then he turned the weighted base upside down and gluedthe two liter base to this. I think he also glued felt or rubber to the bottom of the clay, but I'm not sure. Anyhow, then you just put your water and small fish into this and put the third base over the cut top as a lid. They really look better than they sound.
Date: Mon, 26 Oct 1998 01:56:39 -0800
From: Endora Aphrattos
Organization: PHOENIX RISING OCCULT MAIL FORUM
You are crafty aren't you? GRIN Ok, I'll do something crafty...Lemme see...Well, I am always working on this or that.
I have several crochet projects going, though one I can't find the thread to finish so it may be in perpetual incompleatness.
I do computer art practically on a daily basis in some form or another.
I draw fairly regularly, About 50 pictures a month when I really get crackin'.
I paint, I have a portrait that is almost compleat, I just have to add highlights. I usually don't paint until it gets cool so it's been waiting for me to compleat it all summer.
I love ceramics but haven't the time nor money to get involved in that again just yet. So I suppose I compensate with clay, using marblex so it needn't be fired. The last project I did was a Penates (Roman figure to be embodied by the house spirit).
I make doll clothes, Mainly the fashion doll sort, like Barbie and Ken. At least I do when I can get my sewing machine to work. LOL I also make a lot of my own clothes, or use to and again, it depends greatly on "granny's" temperment. Granny is what I call the ancient machine I use...
Actually I do or have done just about any craft imagineable at some point or another. I've even
some indian seed beadings I am working on. GRIN
Date: Wed, 28 Oct 1998 14:40:41 -0800
From: Crone
Organization: Mama Yasmini's Place
Yes, Endora, I am crafty, but then I am a witch. (grin)
What crochet thread are you looking for. Perhaps someone on the list - in a different area (heck or even country - than you are can find it for you. Wouldn't hurt to give it a shot. Sure hate to see uncompleted projects (like I don't have enough of my own).
I used to draw, many moons - maybe I should make that eons - ago. My daughter had a border of cartoon characters around her bedroom wall at the ceiling. Most of the work I did was either cartoons or scenery. Haven't done it for years now, and doubt I'll ever get back into it. The closest I come now is designing very simple things to embroider on my other projects.
Ooooooo, another addiction coming on??? Clay projects that don't need to be fired??? Wow, can you describe a little when you have a chance? I'd love to do some things. Can you use molds with this stuff? And, does anyone know where I might be able to get some molds and materials to make little statues of the orishas? Deirdre, do they have molds of things like this - or even the statues themselves - in Puerto Rico?
Sewing - well, I've been sewing since I was 10 - actually probably younger - but I started making my own clothes then. Never had anything bought until I was in my teens. Made my daughter's clothes when she was small, too. Didn't fiddle much with things like doll clothes, too fiddly for me, and stopped making clothes when I was working at least one, often 2 jobs while raising my daughter. Now, well, with the few clothes I wear, it hardly seems worth it.
Date: Mon, 26 Oct 1998 18:47:33 -0500
From: Angie Ahearn
Not sure if this was an open question to the list, but here goes anyways. I just broke out my Dremel, a small, handheld rotary tool with different attatchements, cutters, grinders, sander drums, drills..etc. So, I've been playing with a bunch of wooden beads, turning a few of the disks into pentagrams. Four out of five beads later, I've got one almost finished without breaking it.
Date: Mon, 26 Oct 1998 17:07:58 -0800
From: Crone
Organization: Mama Yasmini's Place
Turning beads into pentagrams sounds time consuming. Good thing we love what we do, isn't it? :) How are you going to use them? Do you think you could attach them on the ends of drawstrings for tarot card or rune bags? I'll bet it looks great.
Date: Tue, 27 Oct 1998 19:14:58 -0500
From: Angie Ahearn
Well, it's definately an exercise in patience. I hadn't really gotten to the point of actually doing something with them, but putting them on drawstrings for a tarot bag sounds ideal. But that would mean I'd have to make a tarot bag Date: Wed, 28 Oct 1998 17:53:43 -0800 How about a small string of any herbal beads decorating a bottle of bath oil or wrapped around a container of bath salts or bath herbs. How about tucking some into a gift basket full of toiletry products. Or, take one bead and string it on a tie for a bath or soap bag. :)
My husband and I were given an old cauldron (probably over a hundred years in age, we estimate) that someone used as a speaker holder for a stereo. The person did not pierce the cauldron but jammed a wooden frame into it that held the speaker in place, then poured foam into it and painted it black (like the cauldron).
I have not had a great deal of physical strength in my right arm since shattering the wrist and breaking the bones in the forearm about 8 years ago. I have been unable to figure a way to get the speaker out of the cauldron.
Burning the foam would cause (no doubt) causic fumes. Acid would ruin the old cast iron cauldron itself. I have been unable to wrench the speaker free. An axe might damage by cauldron so I have been (gingerly) using a rock hammer to try and break up the wood.
Any ideas?
Date: Sun, 08 Nov 1998 21:30:35 -0800
From: Endora Aphrattos
Organization: PHOENIX RISING OCCULT MAIL FORUM
GET THAT SPEAKER OUT OF MY CAULDRON:
Hmmm? What an odd place to put a speaker...Wonder where this fellow kept his potions and stews...Nevermind, the possibilities are too frightening.
Not being able to physically see the problem of course this is a toughie to try to jab at, but how about a keyhole or jig saw? It might be slow, but you'd eventually be able to cut away at it until it is removeable. Also, you might try a chemist...They might know of an acid which you could use that wouldn't harm the cauldron itself.
Date: Tue, 10 Nov 1998 11:00:28 -0800 Sierra, another place you might try for getting the cauldron cleaned out - or maybe advice on it - is a blacksmith - you know, those guys who shoe horses. (grin) I have a cast iron deep frying pan that an idiot who once lived in my house decided to rinse in cold water right from a hot stove. Yup, nice crack in it and the pan is over 100 years old - it was my grandmother's pan. Anyway, there is a blacksmith in our area (well, sort of our area) where I hope to take it to be fixed as soon as I can afford it. If you can find one in your area, perhaps he/she can give you some ideas on how to preserve the cauldron while getting rid of the unwanted "ingredients". (grin)
Let us know how it works out. You never know when someone else may need help with something like this.
[pagancrafts] Re: Mandala I used purple felt for the backing. using small beads, like 8mm i put a dark blue one in the middle.
then i circled it deosoil with purple ones. then a ring of the blue around that. until you have 9 rings.
this is glued or something to a flat rock. you gaze at it following the rings using usually a blue candle with the light reflected over it. it has been awhile since i used it. may need to get it out and start using it again. it was from a book called "spell crafts"
A Cute Project
Date: Sat, 24 Oct 1998 12:57:57 -0500 Here's something else you might be interested in: These are belly button brushes made of a piece of pipe cleaner glued into an oblong bead. A bunch of gals on another list make these and take them to craft fairs. They sell for 50 cents and some have sold more than 100 of them in one day. They would be inexpensive to make and take up
little space which would be a plus for you...
[pagancrafts] Places to go and a recipe I didn't read most of this. If it says for FREE I put the URL down. Hope you all find something in it.
The Celtic Lady's Book Store(TM)
Your Mining Co. Guide to Beadwork
Guides in this Interest Area - Arts/Crafts
Welcome to the Celtic art and Illumination page!
Embroidery (General) PLUS Needlework commercial sites PLUS more
Costume Patterns- Period Patterns from Mediaeval Miscellanea
Here is a little something on Hand Dyeing
Workshop was on how to get 8 gradations of one color at one dyeing (one long day)..............
Supplies:
20 yrds - unbleached muslin (7878 or greige fabric) or mercerized cotton print cloth Steps: * variations:
SUGGESTION: This could be a group project done at a laundramat. We could take over the laundramat for the day (by owner's permission) and several of us could do different colors. When done they could be shared by all who brought cloth.
[pagancrafts] Craft Question for the Loop I have a question to pose to the whole group and I really need some HONEST feedback here...
I crochet shoelaces for my kiddies and for my extended family, and they all think that they are wonderful...my hubby has been after me to actually market them because he thinks they would go over big, I think its such a simple matter to make them, only takes a few minutes anybody who can crochet can make them....but he is pushing so I decided to ask all of you...most of you have much more experience in the craft world than I do....so I could really use some input here...
I've never seen crocheted shoelaces. What do you do for the aglet (that little plastic-type thing on each end that lets you thread the shoelaces through the holes)?
Date: Mon, 26 Oct 1998 08:48:03 -0800 Thanks for the encouragement Hazel....as I am currently only using the laces at home and for close family I don't have an idea for the aglet yet, but my mind is brimming with them so I'm sure I can come up with something suitable....
Date: Tue, 27 Oct 1998 06:03:29 -0500 Hi, umm this is just off the top of my head, but maybe you could find a long, thin bead that would work as the aglet?
Date: Mon, 26 Oct 1998 10:11:32 -0800 Thanks everybody for all the input, keep it coming...I just love pats on the back...LOL
I have decided to go for it...I just love to sit and make these and they are really easy to make cute like you said Carole....so I've started this moring and am going to the craft store for some ideas for the ends....
This is me Excited about a new project.....YIPPIEE!!
Date: Mon, 26 Oct 1998 11:12:58 -0800 Would it work to use white glue, roll the crotched end in it and compress it down to dry small?
Date: Mon, 26 Oct 1998 20:23:09 EST You might dip the ends into something like polyurethane (varnish) and twist, then when they're dry, dip them a second time. This was recommended in some magazine years ago to repair old shoestrings that had lost their ends. When you decide on a price, let me know what it is. Maybe I can buy some from you.
Date: Mon, 26 Oct 1998 20:46:29 EST If the white glue is waterproof, it might work. I don't know anything about white glue, except that it dries clear. That's why I recommended polyurethane varnish. Shoelaces have a tendency to get wet a lot, especially on little kids' feet.
Date: Mon, 26 Oct 1998 18:12:31 -0800 Thanks Hazel...I like the poly-blah-blah-thane idea....like my spelling..LOL
I'll give it a try....
From: Crone
Organization: Mama Yasmini's Place
[pagancrafts] Cleaning a cauldron
Date: Sun, 8 Nov 1998 14:29:48 +0000
From: Sierra
From: Crone
Organization: Mama Yasmini's Place
Date: Tue, 10 Nov 1998 10:57:01 -0600
From: Traci' L Pederson
From: Stacy - The Country Cottage
BellyButtonBrush
Date: Sat, 24 Oct 1998 14:55:06 -0700
From: Beverly Viel
8 t - synthrapol
4 T - Procion MX reactive Dye (in what ever color you want)
9 T per gallon of wash water - washing soda or soda ash (check out how many gallons it takes to fill your washer's tub)
4 1/2 C - salt
9 - 5gal buckets
4 cup measuring container
AND LOTS AND LOTS OF HOT WATER!!!!!!
1. cut the 20 yrds. of muslin into 8 .... 2 1/2 yrd. pieces
2. (1st wash) using the longest and hottest cycle on a washer, add 4 t of synthrapol to your 8 pieces of muslin
3. (2nd wash) using the longest and hottest cycle on a washer, add the soda ash (washing soda) to your 8 pieces of muslin (note: if your machine spins with the addition of cold water DO NOT SPIN...hand wring!)
4. DO NOT LET YOUR FABRIC DRY....keep in rubber maid container until ready to dye (or for longer then a couple of hours in a plastic bag in the refrigerator)
5. prepare 9 numbered - 5 gallon buckets in the following way:
B) in each bucket put 1/2 C of salt
C) in 4 cup measuring cup add 1/2 C of hot water from bucket #9
D) now add 4 T of what ever color of dye you want to the 1/2 C of hot water.......STIR!!!!! *
E) from bucket #9 add 1 1/2 C hot water to measuring cup (this is now your dye concentrate)
F) add 1 C of dye concentrate into bucket #1
G) from bucket #9 add 1 C hot water to measuring cup
H) add 1 C of dye concentrate into bucket #2
I) from bucket #9 add 1 C hot water to measuring cup
J) add 1 C of dye concentrate into bucket #3
K) from bucket #9 add 1 C hot water to measuring cup
L) add 1 C of dye concentrate into bucket #4
M) from bucket #9 add 1 C hot water to measuring cup
N) add 1 C of dye concentrate into bucket #5
O) from bucket #9 add 1 C hot water to measuring cup
P) add 1 C of dye concentrate into bucket #6
Q) from bucket #9 add 1 C hot water to measuring cup
R) add 1 C of dye concentrate into bucket #7
S) from bucket #9 add 1 C hot water to measuring cup
T) add 1 C of dye concentrate into bucket #8
U) from bucket #9 add 1 C hot water to measuring cup
7. 30 mins. for the dyeing time....kneading every 10 mins.
8. wash the dye out of the 4 cup measuring cup using windex
9. from bucket #9 add 4 cups of hot water to measuring cup along with 8 T of soda ash
10. add 1 cup of solution to buckets #1 - 4
11. from bucket #9 add 4 cups of hot water to measuring cup along with 8 T of soda ash
12. add 1 cup of solution to buckets #5 - 8
13. leave fabric in 60 mins. longer....kneading fabric every 10 mins.
14. remove, wring out, and place on separate piece of plastic each piece of fabric
15. dump the dye baths.......they will not contaminate sewer!
16. wash fabrics from buckets # 1-4 (darks) together and #5-8 (lights) together in separate washes
A) 1st wash, longest/hottest
B) 2nd wash, longest/hottest, add synthropol
C) 3rd wash, longest/hottest
LIGHTS:
A) 1st wash, longest/hottest
B) 2nd wash, longest/hottest, add synthropol
C) 3rd wash, longest/hottest
17. line or tumble dry
for created color like purple 2 T red & 2 T blue
Date: Sun, 25 Oct 1998 18:27:07 -0800
From: Kathy O/Kat WillowMoon
Date: Mon, 26 Oct 1998 05:29:52 EST
From: Hazel
From: Kathy O/Kat WillowMoon
From: Cathleen
From: Kathy O/Kat WillowMoon
From: Mary, Well, Naturally Products
From: Hazel
From: Hazel
From: Kathy O/Kat WillowMoon
 PaganCrafts Home